MICRO HARDNESS TESTER

Vickers hardness tester for micro and macro Vickers and Knoop tests.

WIKI 90 CNC

MICRO HARDNESS TESTER

Hardness tester for micro macro Vickers and Knoop.

WIKI 90 CNC

Hardness tester for Vickers and Knoop tests

Microhardness testing machine WIKI 90 CNC is a Vickers and Knoop hardness tester with test loads from 10gf to 62,5 kgf (at request from 1gf). This hardness tester is suitable to test Micro Vickers, Macro Vickers, Knoop, and Brinell hardness test scales. WIKI 90 CNC is conformed to all hardness standards including ASTM and ISO.

Test loads

from 10 gf to 62.5 kgf (0.098 to 612.9 N

Vickers ISO 6507 / ASTM E-384 / ASTM E-92

HV0.001 – HV0.005 – HV0.01 – HV0.015 – HV0.02 – HV0.025 – HV0.05 – HV0.1 – HV0.2 – HV0.3 – HV0.5 – HV1 – HV2 – HV3 – HV5 – HV10 – HV20 – HV30 – HV50

Knoop ISO 4545 / ASTM E-384 / ASTM E-92

HK0.01 – HK0.02 – HK0.025 – HK0.05 – HK0.1 – HK0.2 – HK0.3 – HK0.5 – HK1

Brinell ISO 6506 / ASTM E-10

HBW 1/1 – HBW 1/1.25 – HBW 1/2.5 – HBW 1/5 – HBW 1/10 – HBW 1/30 – HBW 2.5/6.25 – HBW 2.5/7.8125 – HBW 2.5/15.625 – HBW 2.5/31.25 – HBW 2.5/62.5

Motorized and automatic, the test is not affected by operator influences and can easily be used by operators of every level

Micro hardness tester for Vickers and Knoop tests

Microhardness testing machine WIKI 90 CNC is a Vickers and Knoop hardness tester with test loads from 10gf to 62,5 kgf (at request from 1gf). This hardness tester is suitable to test Micro Vickers, Macro Vickers, Knoop, and Brinell hardness test scales. WIKI 90 CNC is conformed to all hardness standards including ASTM and ISO.

Test loads

from 10 gf to 62.5 kgf (0.098 to 612.9 N)

Vickers ISO 6507 / ASTM E-384 / ASTM E-92

HV0.001 – HV0.005 – HV0.01 – HV0.015 – HV0.02 – HV0.025 – HV0.05 – HV0.1 – HV0.2 – HV0.3 – HV0.5 – HV1 – HV2 – HV3 – HV5 – HV10 – HV20 – HV30 – HV50

Knoop ISO 4545 / ASTM E-384 / ASTM E-92

HK0.01 – HK0.02 – HK0.025 – HK0.05 – HK0.1 – HK0.2 – HK0.3 – HK0.5 – HK1

Brinell ISO 6506 / ASTM E-10

HBW 1/1 – HBW 1/1.25 – HBW 1/2.5 – HBW 1/5 – HBW 1/10 – HBW 1/30 – HBW 2.5/6.25 – HBW 2.5/7.8125 – HBW 2.5/15.625 – HBW 2.5/31.25 – HBW 2.5/62.5

Motorized and automatic, the test is not affected by operator influences and can easily be used by operators of every level

ONE BUTTON MEASUREMENTS

Micro hardness tester WIKI 90 CNC is a motorized and automatic system for Vickers, Knoop, or Brinell hardness testing with load cell technology, a high definition camera for indent auto-reading, and a motorized turret with 6 positions (4 steps for lens and 2 steps for indenters). Fully conforms to ASTM and ISO hardness standards.

One button measurement:

Click the START button: the hardness tester indents the sample, moves to the camera, measures, and generates data dynamically. Semi-automatic case hardness depth (CHD) can be easily done thanks to the 1µm step XY table connected to the PC and the step-by-step assisted procedure.

For micro-macro Vickers and CHD case depth tests on all metals: iron, steel, tempered steel, cast iron, brass, aluminum, copper, and metal alloys. Heat treatment, hardening, nitriding, cementation, and hard facing. Knoop test on ceramic and glass materials.

Speed, accuracy, and infinite functions in a semi-automatic solution.

EASY STEP-BY-STEP CHD

Vickers Knoop hardness test report
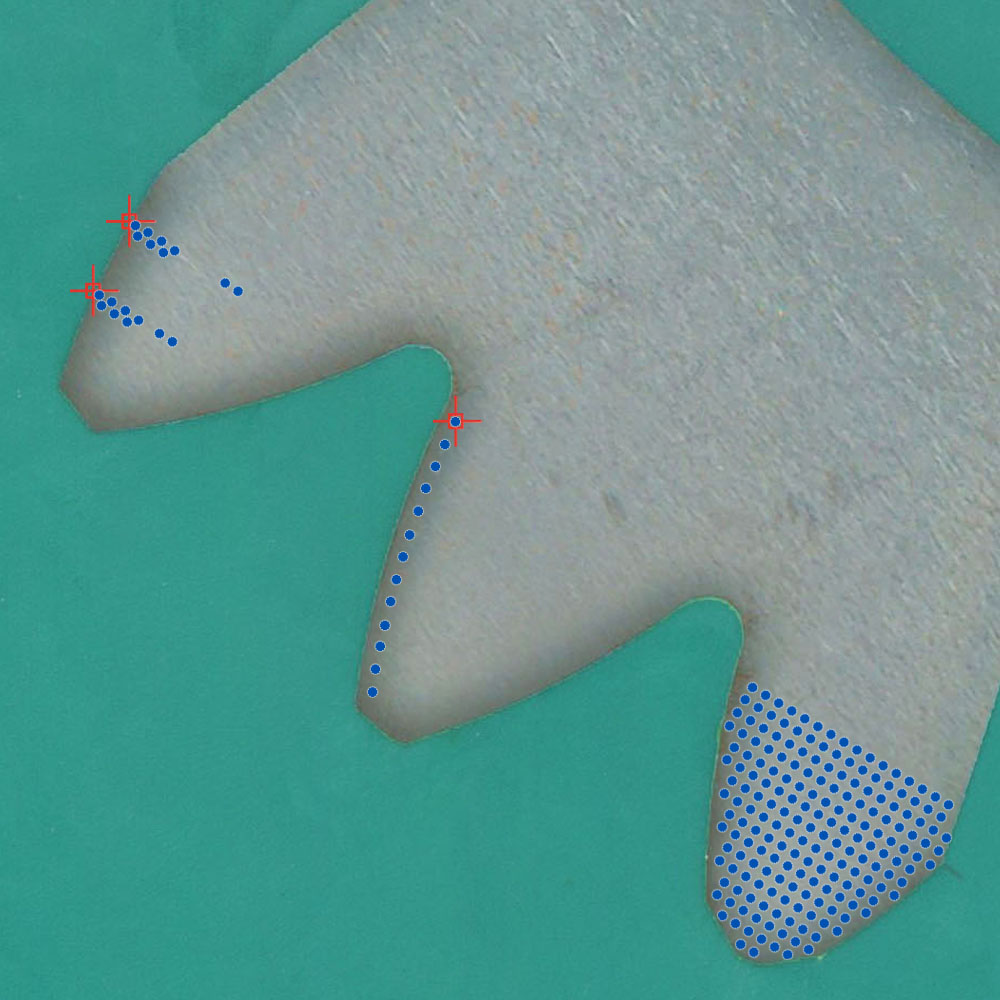
  • CHD TRAVERSES AND PATTERNS
    Single or multiple traverses/patterns can be rapidly created. With one simple click of the line, the angle and the starting point of the indentations are determined.
  • SEMI-AUTOMATIC CHD TESTS
    Digital micrometers connected to the PC. Movements resolution of 1 µm step. Step-by-step assisted procedure to easily test at the perfectly right XY quote.
  • CREATE, SAVE AND RELOAD
    No need to create the same pattern over and over again. This feature is extremely useful for users who analyze the same kind of areas repeatedly. Once a pattern has been created, you can save it and re-load it later to duplicate the analysis on a new sample.
  • EDIT, MOVE, OR DELETE
    Select the pattern from the preview image and modify direction, position, hardness scale, number and distances of indent, pattern name, and point of focus.
  • IN AND OUT ZOOMING
    Zoom out to look at the entire sample in order to identify the pattern position and direction. Zoom-in to verify pattern distances and spot surface imperfections.

LOOKING FOR A SMART SOFTWARE?

It can’t be easier! The Vickers software is suitable to fulfill any measuring need and to be accessible to every operator.
This is a “SMART SOFTWARE”, extremely user friendly but complete of all the functions needed for simple or multi- cycles Vickers hardness tests:

  • Single and simple Vickers test
  • The automatic conversion in all scales (Rockwell, Brinell, Knoop, ASTM, and ISO)
  • Multi-test and multi-sample hardness test with automatic cycle
  • Automatic Vickers case hardness depth (CHD, NHT, EHT, RHT, ..)
  • The dimensional measure of layers
  • Crack measurements
  • Automatic Vickers test on Welding
  • Direct result export via Ethernet
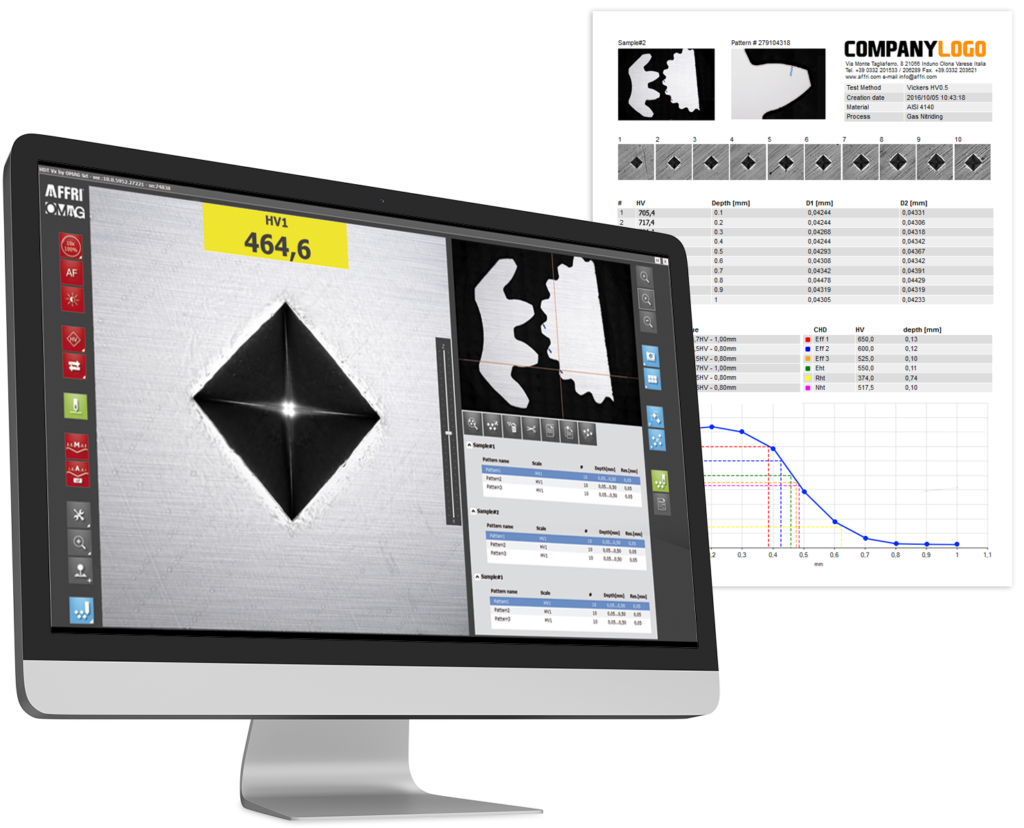
  • Customizable test report with the client logo, specimen information, indent images, statistics, and graphs.

Ready for INDUSTRY 4.0!

Vickers hardness test software touchscreen

LOOKING FOR A SMART SOFTWARE?

Vickers hardness test software touchscreen

It can’t be easier! The Vickers software is suitable to fulfill any measuring need and to be accessible to every operator.
This is a “SMART SOFTWARE”, extremely user friendly but complete of all the functions needed for simple or multi- cycles Vickers hardness tests:

  • Single and simple Vickers test
  • The automatic conversion in all scales (Rockwell, Brinell, Knoop, ASTM, and ISO)
  • Multi-test and multi-sample hardness test with automatic cycle
  • Automatic Vickers case hardness depth (CHD, NHT, EHT, RHT, ..)
  • The dimensional measure of layers
  • Crack measurements
  • Automatic Vickers test on Welding
  • Direct result export via Ethernet
  • Customizable test report with the client logo, specimen information, indent images, statistics, and graphs.

Ready for INDUSTRY 4.0!

FREE YOUR TIME FOR OTHER TASKS

Knoop hardness test software

Micro hardness tester WIKI 90 CNC has software designed for intuitive and simple use. All you have to do, for case hardness depth, with three easy steps:

Obtain a perfect, detailed, high-resolution panoramic view of the sample using the panoramic feature. The picture is clear, sharp, and without any distortion.

Create, save, open, modify, copy or paste Vickers multi-tests to predefined locations with a simple click. Create case depth traverses or fill a surface with indentation points to control sample uniformity.

The hardness tester brings you to the right position, indents the sample, measures, and generates data dynamically. Review results in graphical and/or tabular format. Export results to any spreadsheet application, or simply print standard or customized reports.

The Vickers hardness tester teaches the operator how to move, saving time and money, thus increasing the accuracy of results.

AUTO-COMPENSATION OF ALL DEFLECTIONS

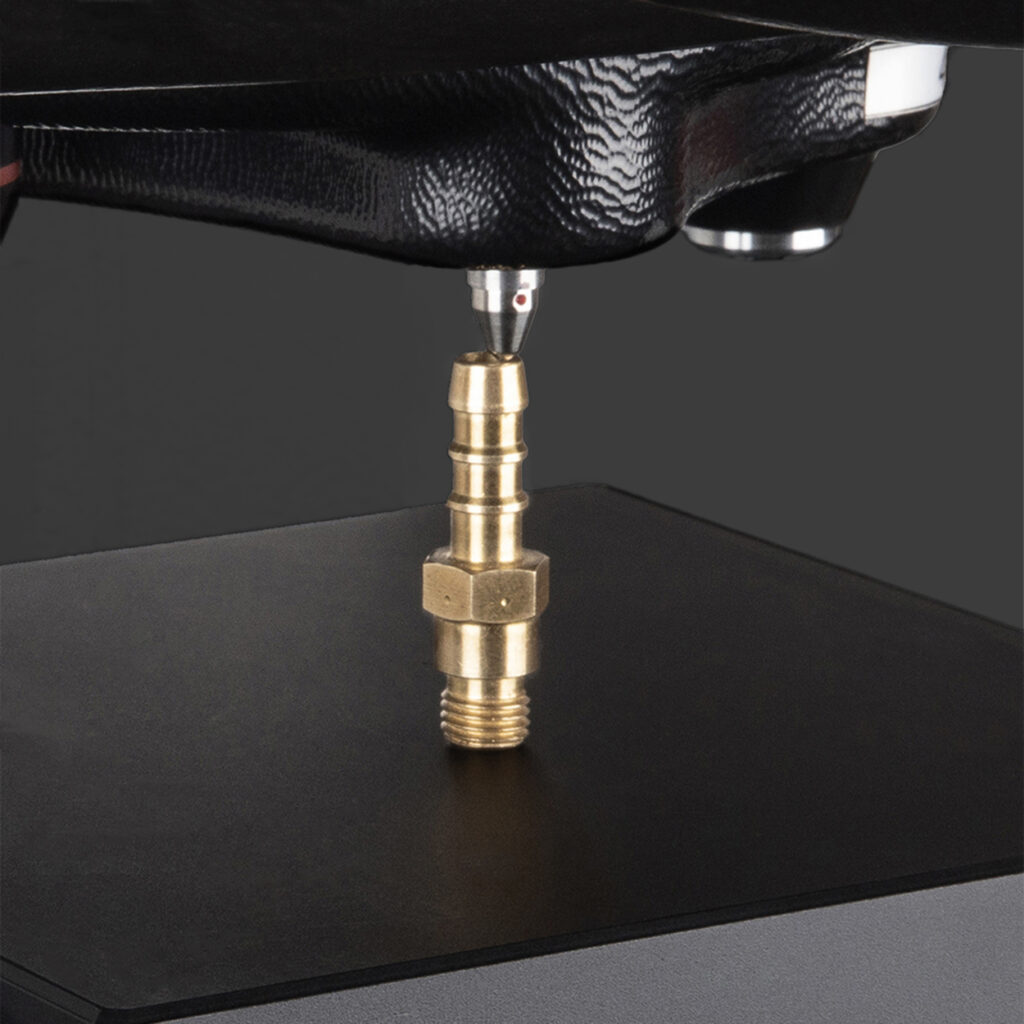
When testing unstable samples or deflecting parts, the AFFRI System will follow the sample without losing contact thanks to its infinite stroke for indenter and clamping hood.

Load forces are applied through load cells and controlled in “Closed Loop” with a frequency of 1 kHz, assuring perfect linearity in every range. Results are not affected by any structural deflection, misalignment, or vibration.
Accurate measurements on the first test, even in extreme conditions, eliminate the need for repeated tests. The R&R data is at the top of its class.

Vickers Hardness tester valve

AUTO-COMPENSATION OF ALL DEFLECTIONS

Vickers Hardness tester valve

When testing unstable samples or deflecting parts, the AFFRI System will follow the sample without losing contact thanks to its infinite stroke for indenter and clamping hood.

Load forces are applied through load cells and controlled in “Closed Loop” with a frequency of 1 kHz, assuring perfect linearity in every range. Results are not affected by any structural deflection, misalignment, or vibration.
Accurate measurements on the first test, even in extreme conditions, eliminate the need for repeated tests. The R&R data is at the top of its class.

VICKERS HARDNESS TESTER WIKI 90 CNC

MAIN FEATURES

MOTORIZED TURRET

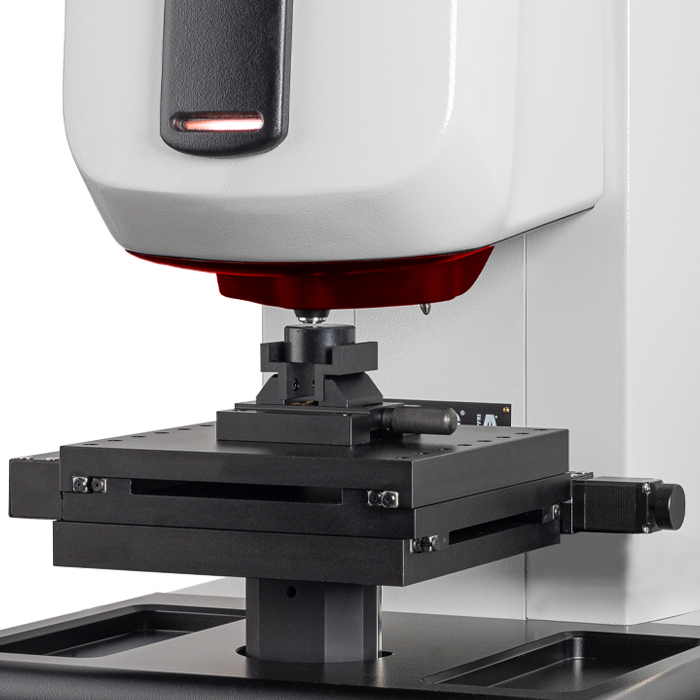
Horizontally rotating turret with 4 slots for magnification lenses and 2 for indenters. All-optical microscope objectives can be pre-installed and combined with indenters for every Vickers and Knoop hardness scale.
ANTI-COLLISION SYSTEM

Anti-collision system is a safety system that blocks the head and sends it back, in case it encounters an unexpected obstacle during the descent. This new function assures maximum accuracy in any condition and maximum safety for operators.

7° INCLINED TURRET

Our engineers have designed a new position for the turret based on the studies done in our laboratories. We have inclined the head by 7° , because it is the necessary inclination so that when the turret rotates it does not touch anything and can rotate freely in safety.

AUTOMATIC READING

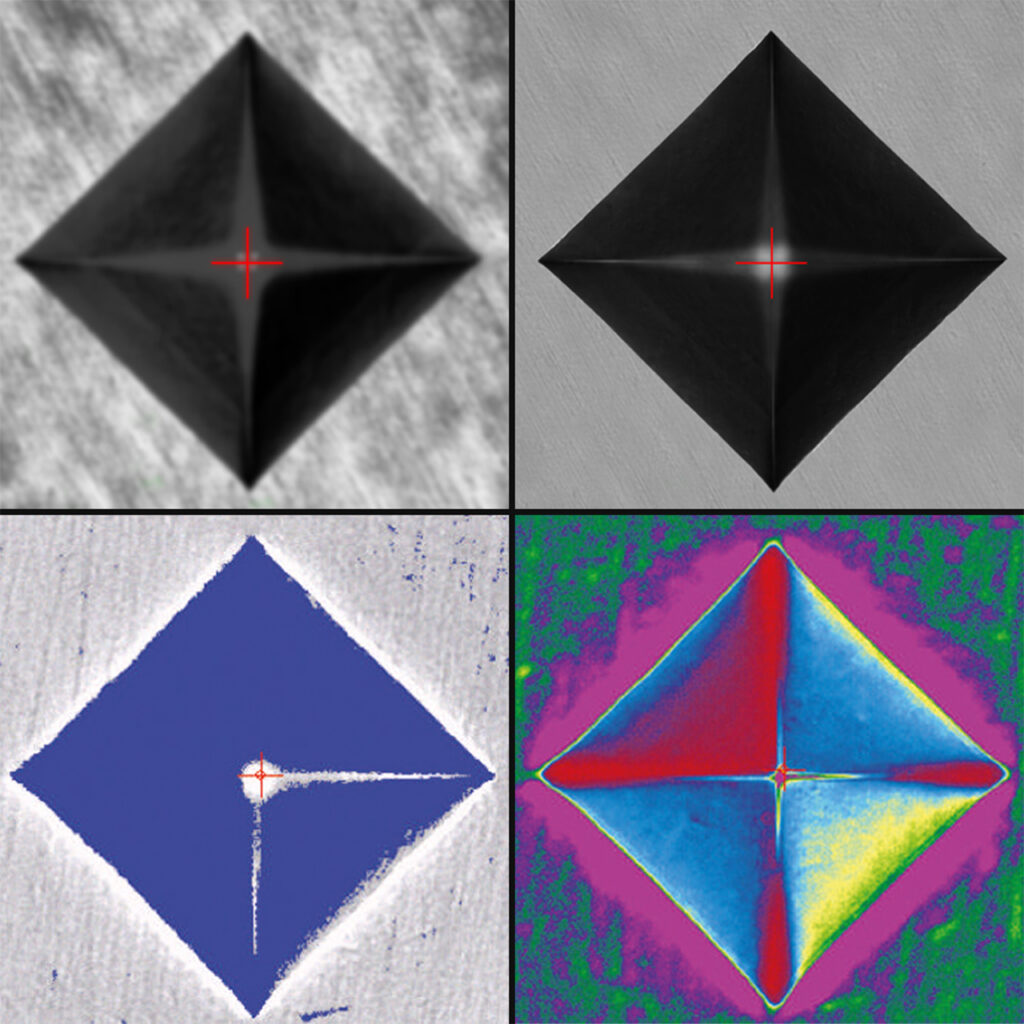
Automatic indentation reading through the camera. Vickers, Knoop, and Brinell measurements with the same hardness testing machine. From perfectly polished to rough & etched samples, the software will automatically measure indents on any sample surface.

LIGHT CONTROL

Automatic light regulation on dark, opaque or polished samples. The hardness tester controls and adjusts the light and contrast to find the right combination and measure the indent. Just place the specimen and click the illumination button to see the change.

TEST REPORT

Customizable test report with company logo and information. Put as much sample information as you need, including pictures of the indents and test area. Examine results, statistics, and CHD diagram. Results can be exported also as a CSV file.
Vickers indentation

THE AUTOFOCUS

With software controlled focus, image cleaning, shading correction and regulated light source, reproducible results are obtained regardless of the number of indents measured. From perfectly polished to rough and etched samples, the auto-detection capabilities of WIKI 90 CNC allow measurements on a variety of sample surfaces.

AUTOMATIC MEASUREMENT CYCLES ON MULTI SAMPLES

Create single or multiple traverses or patterns on samples of any kind of shape. No need to create the same pattern over and over again, just copy and paste the previous pattern and get start the multi-measure cycle. Study the Case Hardness Depth, sample uniformity or uniformity per radius.

WELDING HARDNESS TESTS

Acquire the panoramic image of the entire weld and identify the base material, the fusion material and the heat-affected area. The specific software dedicated to welding tests allows to set test paths by defining the distances between the indentations, from the edges and from the different materials with respect to the heat-affected area. Few minutes to have results.

Vickers hardness CHD

CHD TRAVERSES

Case Hardness Depth

Vickers hardness CHD gear

FREE PATTERNS

Create the shape you want

Vickers hardness surface

SURFACE PATTERN

Study sample uniformity

Vickers hardness superficial

RADIUS PATTERN

Study uniformity per radius

Vickers hardness test weld

WELD TEST

Automatic cycles

Vickers hardness crack test

FRACTURE TOUGHNESS

Vickers indentation crack length

Vickers hardness layer

DIMENSIONAL MEASUREMENTS

Layer thickness or detail length

BAR-CODE SCANNER

Import sample info or measure pre-set