
HARDNESS TESTER FOR
CAMSHAFT AND CRANKSHAFT
Automatic Rockwell hardness tester

MATRIX
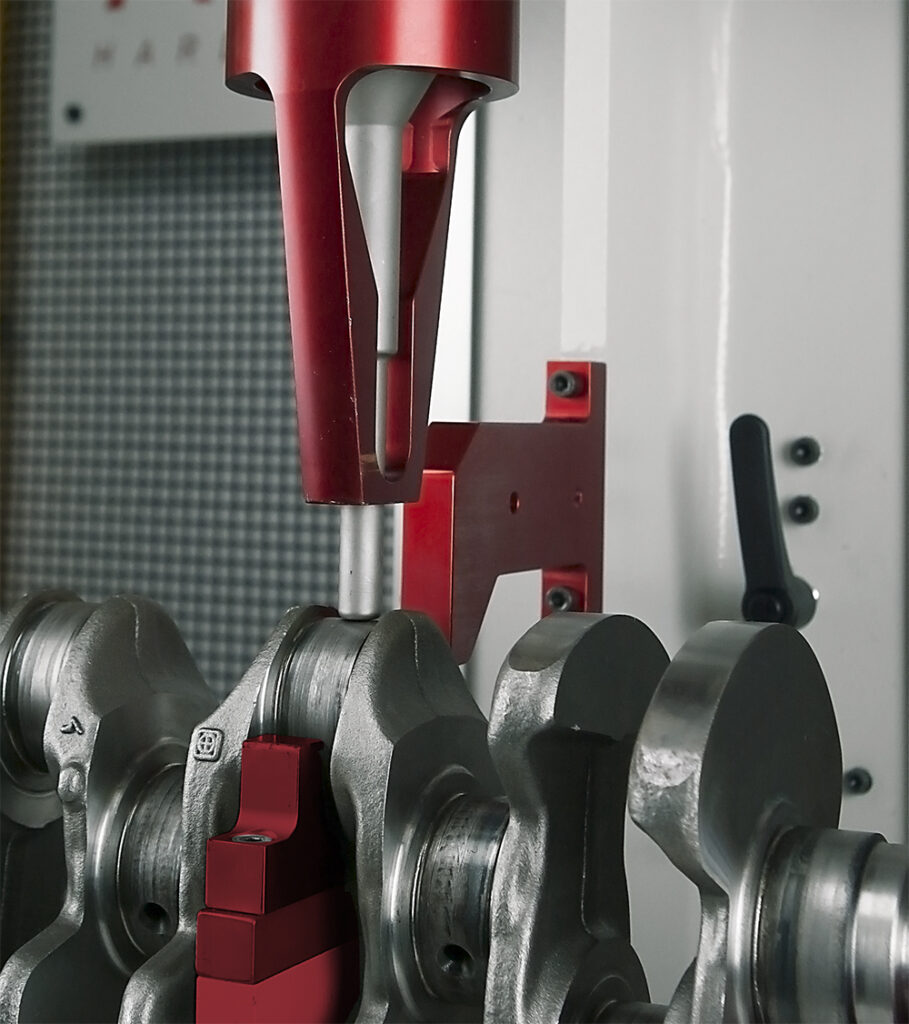
HARDNESS TESTER FOR CAMSHAFTS AND CRANKSHAFTS
The tester is made with a modular structure to fit different size test pieces. Movements on 3 independent axis and piece rotation of 360° to allow for an easy location of testing points.
With this hardness tester, it is possible to perform measurements directly during manufacturing process, so that the annealing oven staff can be informed in real time about test results.

TEST LOADS
from 1 to 250 kgf (9,807 to 2452 N)
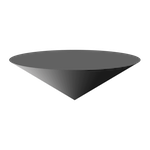
ROCKWELL
HRA – HRB – HRC – HRD – HRE – HRF – HRG – HRH – HRK – HRL – HRM – HRP – HRR – HRS – HRV

SUPERFICIAL ROCKWELL
HR15N – HR30N – HR45N – HR15T – HR30T – HR45T – HR15S – HR30S – HR45S – HR15W – HR30W – HR45W – HR15X – HR30X – HR45X – HR15Y – HR30Y – HR45Y
HARDNESS TESTER FOR CAMSHAFTS AND CRANKSHAFTS
The tester is made with a modular structure to fit different size test pieces. Movements on 3 independent axis and piece rotation of 360° to allow for an easy location of testing points.
With this hardness tester, it is possible to perform measurements directly during manufacturing process, so that the annealing oven staff can be informed in real time about test results.


TEST LOADS
from 1 to 250 kgf (9,807 to 2452 N)

ROCKWELL
HRA – HRB – HRC – HRD – HRE – HRF – HRG – HRH – HRK – HRL – HRM – HRP – HRR – HRS – HRV

SUPERFICIAL ROCKWELL
HR15N – HR30N – HR45N – HR15T – HR30T – HR45T – HR15S – HR30S – HR45S – HR15W – HR30W – HR45W – HR15X – HR30X – HR45X – HR15Y – HR30Y – HR45Y
ONE BUTTON MEASUREMENT
Just push the start button and the head moves down performing the hardness test cycle in automatic succession without breaching a phase:
- Automatic contact and clamping
- Automatic preloading and loading
- Automatic measure
- Automatic return stroke at programmed distance
The entire test cycle is complete and the result immediately appears on the large display.
TEST LOAD ACCURACY 0.05%
Load forces are applied through load cells and electronically controlled in “Closed Loop” (Pat. AFFRI) with a frequency of 1 kHz. Each load force is automatically programmed and controlled assuring perfect linearity in every range. Results are not affected by any structural deflection, misalignment or external vibration.
Accurate measurements, even on the first test, eliminate the need for multiple tests. There is no need to perform a second test.


ONE BUTTON MEASUREMENT
Just push the start button and the head moves down performing the hardness test cycle in automatic succession without breaching a phase:
- Automatic contact and clamping
- Automatic preloading and loading
- Automatic measure
- Automatic return stroke at programmed distance
The entire test cycle is complete and the result immediately appears on the large display.

TEST LOAD ACCURACY 0.05%
Load forces are applied through load cells and electronically controlled in “Closed Loop” (Pat. AFFRI) with a frequency of 1 kHz. Each load force is automatically programmed and controlled assuring perfect linearity in every range. Results are not affected by any structural deflection, misalignment or external vibration.
Accurate measurements, even on the first test, eliminate the need for multiple tests. There is no need to perform a second test.

MOVE IT IN THE AIR

The hardness tester measuring head moves on 3 independent axis (x, y, z) frontward, backward, to the left and to the right. The measuring system slides over recirculating ball bearing guides to grant light, accurate and fluid movements. The operator can grab the two handles and move the head in the exact position needed, without any effort or difficulty.
The shaft is fixed in position by the sides and it rotates 360° around the main journal axis. By spinning the dedicated wheel, the operator can easily rotate the shaft to find the right testing zone.
FULL CONTROL OF THE AXES
All the movements are controlled and recorder by the machine software. The hardness tester knows where the operator is measuring the shaft, avoiding possible positioning mistakes.
MOVE IT IN THE AIR

The hardness tester measuring head moves on 3 independent axis (x, y, z) frontward, backward, to the left and to the right. The measuring system slides over recirculating ball bearing guides to grant light, accurate and fluid movements. The operator can grab the two handles and move the head in the exact position needed, without any effort or difficulty.
The shaft is fixed in position by the sides and it rotates 360° around the main journal axis. By spinning the dedicated wheel, the operator can easily rotate the shaft to find the right testing zone.
FULL CONTROL OF THE AXES
All the movements are controlled and recorder by the machine software. The hardness tester knows where the operator is measuring the shaft, avoiding possible positioning mistakes.
EVERYWHERE ON ROD AND MAIN BEARINGS
The combination between the X, Y, Z and rotation movements allows for easy positioning on any zone of the rod or the main bearing journal. There are no positioning limits, with the possibility to test the bearing at any angle.
The location of the precise testing point through centering is carried out automatically by moving the head supporting carriage which centres itself in a precise and reliable way thanks the exclusive particular shape of the head anvil.
The moving system of MATRIX allows fast and easy positioning on different testing points of crankshaft in supporting diameters, on connecting rod bearings and cammes.

EVERYWHERE ON ROD AND MAIN BEARINGS

The combination between the X, Y, Z and rotation movements allows for easy positioning on any zone of the rod or the main bearing journal. There are no positioning limits, with the possibility to test the bearing at any angle.
The location of the precise testing point through centering is carried out automatically by moving the head supporting carriage which centres itself in a precise and reliable way thanks the exclusive particular shape of the head anvil.
The moving system of MATRIX allows fast and easy positioning on different testing points of crankshaft in supporting diameters, on connecting rod bearings and cammes.
STEP-BY-STEP COMPUTER ASSISTANCE
This unique feature of MATRIX assists the operator step-by-step during the testing procedure. It shows to the operator where to perform the test and notice when the right spot is reached, it notice errors and mistakes forcing the operator to check. The program save every result associated to a specific specimen position and generates dynamic reports for each
piece cycle with statistics.
MATRIX assistive technology presents a user with a sequence of dialog boxes that lead the user through a series of well-defined steps.


DESIGNED FOR
OPERATOR EXPERIENCE
- Upload the shaft drawings
- Guide the operator step by step
- Universal clamping on any shaft
- Place the shaft in a few seconds
- Live results in network during production
- Load testing procedure with the bar code scanner
- Perform daily calibration as per ASTM and ISO std


DESIGNED FOR
OPERATOR EXPERIENCE

- Upload the shaft drawings
- Guide the operator step by step
- Universal clamping on any shaft
- Place the shaft in a few seconds
- Live results in network during production
- Load testing procedure with the bar code scanner
- Perform daily calibration as per ASTM and ISO std


TECHNICAL
SPECIFICATIONS
| Conformity Standards | EN-ISO 6508-2 / ASTM E18 |
| Load accuracy | Better than 0.05 % |
| Readout Division | 0.1 HR |
| Load range | Preload: 29.42 - 98.07 N (3 - 10 kgf) Rockwell: 588.4 - 980.7 - 1471 N (60 - 100 - 150 kgf) Superficial Rockwell: 147.1 - 294.2 - 441.3 N (15 - 30 - 45 kgf) |
| Feasible tests | Rockwell: HRA - HRB - HRC - HRD - HRE - HRF - HRG - HRH - HRK - HRL - HRM - HRP - HRR - HRS - HRV Superficial Rockwell: HR15N - HR30N - HR45N - HR15T - HR30T - HR45T - HR15S - HR30S - HR45S - HR15W - HR30W - HR45W - HR15X - HR30X - HR45X - HR15Y - HR30Y - HR45Y |
| Dwell Time | Programmable |
| Temperature Range | From 10 °C to 35 °C |
| Data Output | USB |
| Power Supply | 110 or 220 V / 50÷60 Hz |
| Software | Affri - OMAG |
| Principle of Operation | Load Cell and Closed Loop (Affri patent) |
