Discover a complete range of universal material testing machines, perfect for any application, industry, and material type.
UNIVERSAL MATERIAL TESTING MACHINES FOR ALL NEEDS AND APPLICATIONS
Universal Material Testing Machines are indispensable tools for material characterization, widely used in laboratories and industries across the globe. These versatile systems are capable of performing a wide range of mechanical tests, from tension and compression to bending, cutting, and elongation. Whether for quality control, research, or development, universal testing machines provide precise and reliable data for assessing the mechanical properties of materials.
Wide Range of Testing Capabilities
- Versatile Testing: Universal testing machines can perform a variety of mechanical tests, including tensile, elongation, compression, bending, and shear tests. By simply changing accessories, they can accommodate different testing needs.
- Material Characterization: These machines are designed to measure essential material properties such as yield strength, tensile strength, elastic modulus, and deformation, providing comprehensive data for material analysis.
Load Capacity and Configuration
- Various Load Ranges: Universal testing machines are available in different load ranges to suit a wide range of applications:
- Low Load: For loads ranging from 10 N to 5 kN.
- Medium Load: For loads up to 50 kN.
- High Load: For loads up to 3,000 kN, ideal for testing heavy-duty materials.
- Load Cell Configuration: These machines can support up to three selectable load cells, which can be easily configured using the machine’s dedicated software, allowing for precise measurements across varying load conditions.
Software and Automation
- Advanced Software: The included software is highly versatile and customizable, enabling users to program and store testing routines, generate and export graphs, and create customized reports.
- Industry 4.0 Integration: The software is designed to work seamlessly with Windows 10/11 systems and can be integrated into an Industry 4.0 environment, ensuring full compatibility with modern manufacturing and testing processes.
- Real-Time Data Analysis: The software allows for real-time analysis of material reactions to mechanical stimuli, supporting research and development efforts without the constraints of predefined standards.
Specialized Accessories and Customization
- Custom Fixtures and Grips: Universal testing machines can be equipped with a range of custom grips and fixtures tailored to specific materials or testing requirements, ensuring secure and accurate testing setups.
- Temperature Control: For tests that require temperature-sensitive conditions, optional accessories like furnaces and climate chambers can be added to perform tests at different temperatures.
- Extensometers: These machines can be fitted with various types of extensometers, including mechanical and video extensometers, to measure strain with high precision during tests.
Contact us today to learn more and find the right Rockwell testing solution for your needs!
AURA
HIGH-LOAD UNIVERSAL MATERIAL TESTING MACHINE

AURA is a new generation of high-load universal material testing machines. It has a double recirculating ball guides friction-free sliding and it works with a very high-level sensitivity and precision; it is entirely managed by computer software that works with a Windows 10 operative system. It also works with the original Affri system closed-loop and with the bidirectional load cells.
Traction, compression, bending, cyclic, elasticity, creep, on springs, metals, plastics, fabrics, and any other material. Single or repetitive measurements that can be stored in several cycles and combined with product and customer codes. Scanning with Q reader for product self-recognition. Connection to an ethernet network for continuous assistance and calibration, data transmission. Possible multi-cells pre-inserted and always ready for use.
AURA FEATURES
- A unique feature: The Aura Model is being able to install 3 load cells. They have different capacities, but they are always installed, calibrated, and ready for use. Thus eliminating the need for assembly.
- It has reactive measurements with a sensitivity of 1ms (millisecond) and a 100,000 divisions
- A great user experience: our years of hard work have created and developed a management software tailored to the user. This managing software is simple and intuitive and doesn’t require manual or training courses.
- The Aura Model also has a fully guided test procedure combined. Thus, a big part of the process is dedicated to the collection and data processing to gain diagrams and reports complete. These data sheets have, also, information and data that can be filtered and managed directly by the user simplifying, so, all the readings.
- This model was designed to simplify user engagement during the test cycle. This model is has been thought of for all consumer’s needs too. It works, in specific, for measurements on springs or any material tests cycles. All this produced data can be stored in the high-level capacity database to create repetitive cycles.
- Wide choice of accessories, that can be customized, for each type of test. Consult our factsheet and accessories table available.
- Controls are on a high-definition touch panel: very intuitive, easy to use, and equipped with keys.
- Safety precautions with controlled closing and transparent anti-break-in: all according to the CE standards.
- Model Aura has multilingual software connectable to an Ethernet network that can link you with all our experts at any moment. We are at your complete disposal for remote assistance and for data transfer.
- This machine has an absolute measurement on the extension with a definition of 0.001 mm. It also has different strain gauge methods: at contact and optics ones.
TECHNICAL DATA
| MODEL | AURA 10 | AURA 30 | AURA 60 | AURA 100 |
|---|---|---|---|---|
| Capacity KN | 100 | 300 | 600 | 1000 |
| Division N | 3 | 10 | 20 | 30 |
| MAX speed test mm/sec | 350 | 300 | 250 | 250 |
| MIN speed test mm/sec | 0.05 | 0.05 | 0.05 | 0.05 |
| Height capacity | 1000 | 1000 | 1200 | 1600 |
| Resolution | 0.03 | 0.03 | 0.03 | 0.03 |
3MZ
MEDIUM-LOAD UNIVERSAL MATERIAL TESTING MACHINE
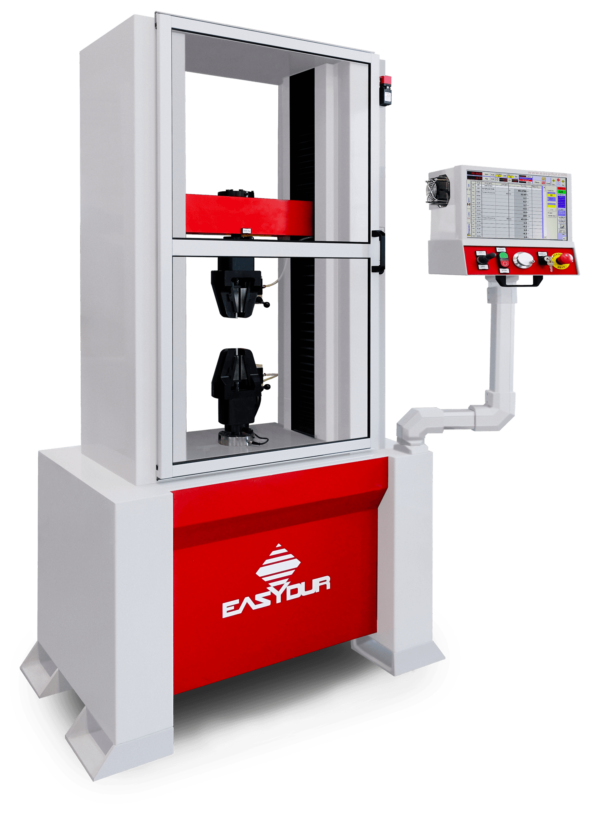
3MZ is a new generation universal material testing machine. It has a medium load and works with double ball bearing guides, friction-free sliding, and it has a very high-level sensitivity and precision. This material testing machine is entirely managed through a computer equipped with a Windows 10 operative system. It also has the original Affri “closed-loop” system, with bidirectional load cells.
Traction, compression, bending, cyclic, elasticity, creep, on springs, metals, plastics, fabrics and any other material. Single or repetitive measurements that can be stored in several cycles and combined with product and customer codes. Scanning with Q reader for product self-recognition. Connection to an ethernet network for continuous assistance and calibration, data transmission. Possible multi-cells pre-inserted and always ready for use.
3MZ FEATURES
- A unique feature: The 3MZ Model is being able to install 3 load cells. They have different capacities, but they are always installed, calibrated, and ready for use. Thus eliminating the need for assembly.
- It has reactive measurements with a sensitivity of 1ms (millisecond) and a 100,000 divisions
- A great user experience: our years of hard work have created and developed a management software tailored to the user. This managing software is simple and intuitive and doesn’t require manual or training courses.
- The 3MZ Model also has a fully guided test procedure combined. Thus, a big part of the process is dedicated to the collection and data processing to gain diagrams and reports complete. These data sheets have, also, information and data that can be filtered and managed directly by the user simplifying, so, all the readings.
- This model was designed to simplify user engagement during the test cycle. This model is has been thought of for all consumer’s needs too. It works, in specific, for measurements on springs or any material tests cycles. All this produced data can be stored in the high-level capacity database to create repetitive cycles.
- Wide choice of accessories, that can be customized, for each type of test. Consult our factsheet and accessories table available.
- Controls are on a high-definition touch panel: very intuitive, easy to use, and equipped with keys.
- Safety precautions with controlled closing and transparent anti-break-in: all according to the CE standards.
- Model 3MZ has multilingual software connectable to an Ethernet network that can link you with all our experts at any moment. We are at your complete disposal for remote assistance and for data transfer.
- This machine has an absolute measurement on the extension with a definition of 0.001 mm. It also has different strain gauge methods: at contact and optics ones.


TECHNICAL DATA
| MODEL | 3MZ 1 | 3MZ 2,5 | 3MZ 5 |
|---|---|---|---|
| Capacity KN | 10 | 25 | 50 |
| MIN division N | 0.33 | 1.23 | 1.7 |
| Useful height | 800 mm | ||
| MIN division | 0.01 mm | ||
| Other capacity | 10, 30, 50, 100, 300, 500, 750, 1000, 1500, 2000, 3000, 5000 N | ||
| MIN division | 1 / 30.000 | ||
| Power supply | 220 V , 50/60 Hz , 200 VA | ||
DYNO
MEDIUM-LOAD UNIVERSAL MATERIAL TESTING MACHINE
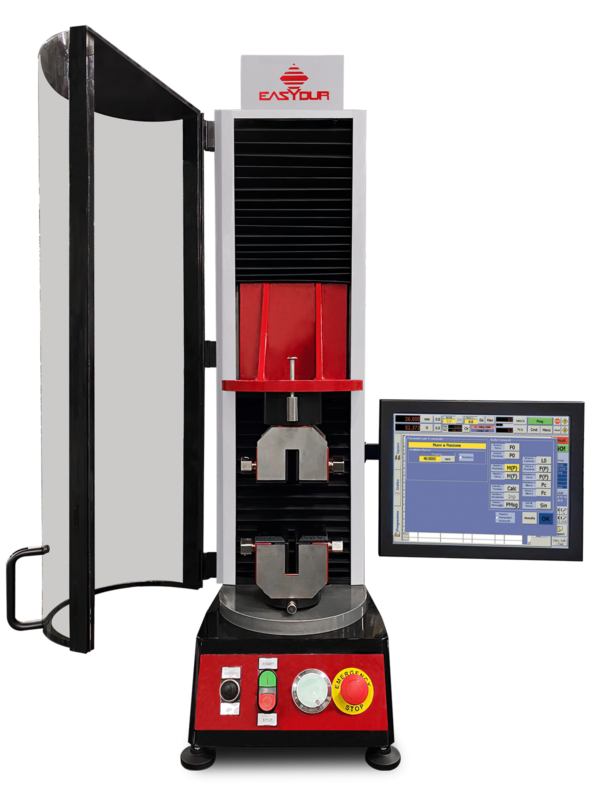
Dyno is a new generation of medium load universal material testing machine with double ball bearing guides and friction-free sliding and very high sensitivity and precision play; is entirely managed by the computer in a Windows 10 environment with an original Affri closed-loop system with bidirectional load cells.
Traction, compression, bending, cyclic, elasticity, creep, on springs, metals, plastics, fabrics and any other material. Single or repetitive measurements that can be stored in several cycles and combined with product and customer codes. Scanning with Q reader for product self-recognition. Connection to an ethernet network for continuous assistance and calibration, data transmission. Possible multi-cells pre-inserted and always ready for use.
DYNO FEATURES
- A unique feature: The Dyno Model is being able to install 3 load cells. They have different capacities, but they are always installed, calibrated, and ready for use. Thus eliminating the need for assembly.
- It has reactive measurements with a sensitivity of 1ms (millisecond) and a 100,000 divisions
- A great user experience: our years of hard work have created and developed a management software tailored to the user. This managing software is simple and intuitive and doesn’t require manual or training courses.
- The Dyno Model also has a fully guided test procedure combined. Thus, a big part of the process is dedicated to the collection and data processing to gain diagrams and reports complete. These data sheets have, also, information and data that can be filtered and managed directly by the user simplifying, so, all the readings.
- This model was designed to simplify user engagement during the test cycle. This model is has been thought of for all consumer’s needs too. It works, in specific, for measurements on springs or any material tests cycles. All this produced data can be stored in the high-level capacity database to create repetitive cycles.
- Wide choice of accessories, that can be customized, for each type of test. Consult our factsheet and accessories table available.
- Controls are on a high-definition touch panel: very intuitive, easy to use, and equipped with keys.
- Safety precautions with controlled closing and transparent anti-break-in: all according to the CE standards.
- Model Dyno has multilingual software connectable to an Ethernet network that can link you with all our experts at any moment. We are at your complete disposal for remote assistance and for data transfer.
- This machine has an absolute measurement on the extension with a definition of 0.001 mm. It also has different strain gauge methods: at contact and optics ones.
Clamping vice and extensometer for every need :
TECHNICAL DATA
| MODEL | DYNO 10 | DYNO 15 | DYNO 20 | DYNO 30 | DYNO 40 |
|---|---|---|---|---|---|
| Capacity KN | 1 KN | 1.5 KN | 2 KN | 3 KN | 4 KN |
| MIN division N | 0.4 N | 0.06 N | 0.08 N | 0.12 N | 0.16 N |
| Useful height | 300 mm | ||||
| MIN division | 0.01 mm | ||||
| Inter-axis columns | 215 mm | ||||
| Plates diameter | 100 mm | ||||
| Power supply | 220 V , 50/60 Hz , 200 VA | ||||
ATI UTM-Pro Mini
UNIVERSAL MATERIAL TESTING MACHINE

Our advanced digital control system allows precise adjustments for zero point, load, deformation, and displacement parameters, with a user-friendly interface. Key features include parameter storage, closed-loop control for visualizing reference curves, and advanced graphical functions for curve analysis, amplification, and overlapping. The system supports real-time analysis, automatic evaluation, and customizable report templates. It includes three photoelectric encoder channels and four frequency multiplication input channels for comprehensive static and dynamic measurements. The system also features eight switch input interfaces for external signals. The EDCH controller ensures high-speed data communication via a USB plug-and-play interface, supporting real-time control and sensor configuration for flexible testing setups.
LOAD FRAME AND LOADING WEIGHT SYSTEM
This testing machine is designed for evaluating the mechanical properties of materials such as rubber, plastics, pipes, films, wires, and more, in both high and low-temperature environments. It is ideal for research, development, and quality control in industrial enterprises, research units, and universities. The frame design prioritizes safety, operator comfort, and flexibility, with strong crosshead guidance for high lateral stiffness. The load cell is highly accurate and interchangeable across frames, ensuring full operational capacity. A preloaded precision ball screw allows for high-speed, precise measurements with minimal noise, while the load frame features four columns and heavy-duty pre-loaded bearings for enhanced stiffness and alignment. The machine automatically stops after completing a measurement cycle or if the force exceeds a set limit, with dual over-travel limits to prevent crosshead overshoot and sensor overloads. The large working area accommodates a variety of sample sizes. The ATI UTM-Pro Mini excels in accuracy, with load measurements ranging from 0.4% to 100% of the rated capacity, and calibration within 0.5% accuracy, adhering to ASTM E4, ISO 7500-1, EN 10002-2, BS1610, and DIN 51221 standards. The load cell offers excellent resistance to impact and provides mechanical overload protection, meeting strict standards in both Europe and the USA.

APPLICATIONS
This testing machine is ideal for evaluating the mechanical properties of materials such as rubber, plastic profiles, pipes, sheets, films, wires, cables, and waterproof coils in both high and low temperature environments. It can perform tests for tensile, compression, bending, peeling, tearing, shear, and other mechanical characteristics. It is particularly useful for research and development, as well as quality control. This versatile instrument is perfect for industrial and mining enterprises, scientific research units, and university quality departments, providing reliable and accurate results for a wide range of applications.
SOFTWARE
TECHNICAL DATA
| MODEL | ATI UTM-Pro Mini |
| Load Capacity: | 5 kN, 10 kN, 20 kN, 30 kN, 50 kN, 100 kN, 300 kN, 600 kN |
| Load Accuracy: | Class 0.5 |
| Testing Load Accuracy: | ± 0.5% |
| Load Resolution: | 1/5000,000 FS |
| Deformation Accuracy: | ≤ ± 0.5% of 0.4% ~ 100% of rated capacity |
| Position Resolution: | 0.025 μm |
| Position Accuracy: | ±0.02mm or 0.5% of displacement |
| Crosshead Speed Range: | 0.001-1000 or 0.001-500 (depending by models) |
| Crosshead Speed Accuracy: | ± 0.5% of set speed |
| Crosshead Travel (mm): | 1000 mm or 1100mm (depending by models) |
| Max Tensile testing space: | 670 mm or 770 mm depending by models |
| Max Tensile Testing Space: | 900 mm or 1000 mm depending by models |
| Test Width: | 450 mm or 550 mm depending by models |
| Compression Plate: | 98 mm |
| Position Limit Switch: | Upper and lower lights |
| Load Cells: | High precision load cell for the highest stability, linearity and stiffness. Over load protection, lateral loading protection, bidirection allows tension and compression test self-recognition function. Regular self-calibration. |
| Power supply: | AC 220V ± 10%, 50Hz / 60Hz |
| Total dimensions: | 850 X 590 X 1750 mm or 840 X 570 X 1850 mm or 950 X 660 X 2000 mm depending by models |
| Operative Temperature Range: | 10°C to 300°C ; -40°C to 300°; -60°C to 300°C ; -80°C to 300°C ; -100°C to 300°C ; 190°C to 300°C ; 190°C to 300°C ; 190°C to 300°C |
| Colling System: | Compressor |
| Temperature Uniformity: | 3.5°C ≤T≤ 200°C |
| Temperarure fluctuation: | ≤ ±1°Cz |
| Max Limit Temperature: | +300°C |
| Heating rate: | 2-3°C / min |
| Power supply: | AC 220V |
| Material of inner box: | Stainless steel |
| Material of outer box: | Stainless steel |
| Heating System: | Nickel-chromium alloy heating wire heater |
| Insulation materials: | Ultra-fine glass wool or rigid foam |
| Air supply circulation system: | A) monitor B) lenghtned shaft C) centrifugal fan |
| Compliance Standards: | Load meets or exceeds the following standards: ASTM E4, ISO7500-1, EN 100002-2, BS1610, DIN 51221. Starin measurement meets the following standards: ASTM E83, ISO 9513, BS 3846, EN10002-4. Safety: EN 50081-1, 580081-1, 73/23/EEC, EN 61010-1. Metals: ASTM E8, ISO 6892, ASTM E21, ISO 783, ISO 7438, ISO 14589, ASTM F606. Plastics/Composities; ASTM D638, ISO 6259, EN ISO 527-1, ISO 604, ASTM D695, ASTM D 3846, ISO 844, ISO 13968, ISO 9969. Geo-texiles: ASTM D3950, ASTM D 6775-02, BS EN ISO 10319, LBT 8521 |
ATI UTM-Pro Max
UNIVERSAL MATERIAL TESTING MACHINE
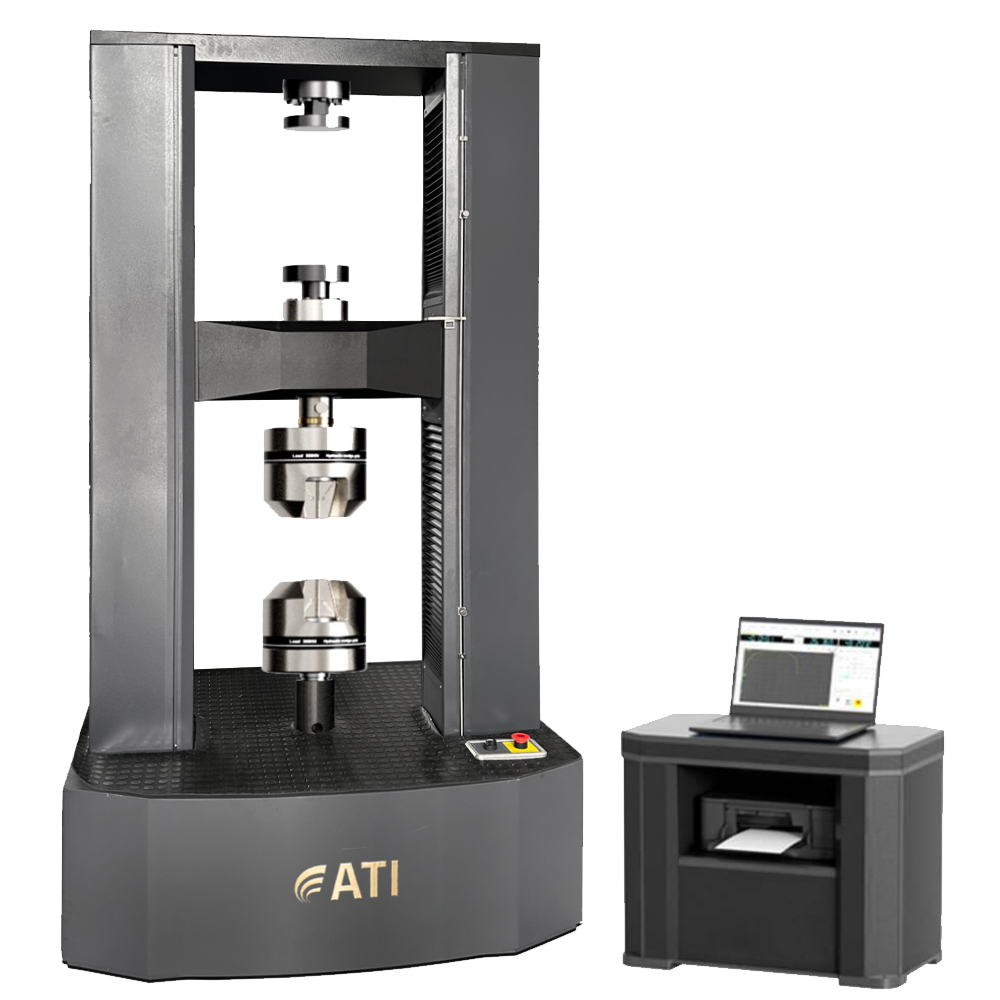
The ATI UTM-Pro Max is equipped with pre-loaded ball screws, heavy duty bearings, and robust guidance columns, ensuring exceptional stability and performance during testing. The design features aluminum covers with chamfered corners, facilitating convenient attachment of various accessories. A high-accuracy USA load cell is incorporated, enabling precise measurement of high loads, essential for rigorous testing requirements. The machine’s remote control system allows operators to monitor key parameters, including load, displacement, and speed. It also facilitates control over critical functions such as test initiation, termination, and zero clearing, enhancing operational efficiency. To ensure safety, the ATI UTM-Pro Max features a fully enclosed safety shield that protects users during testing. Various gripping options, including pneumatic, hydraulic, and manual wedge-type grips, can be accommodated alongside bending fix- tures, allowing for versatile testing configurations within the chamber. An integrated limit indicator further enhances safety by illumi- nating upper and lower lights when the electronic limit is touched, preventing potential sensor overloads and equipment damage. This combination of advanced features makes the ATI UTM-Pro Max a reliable and efficient solution for material testing in diverse applications.
LOAD FRAME AND LOADING WEIGHT SYSTEM
The ATI UTM-Pro Max is a high-performance testing machine featuring pre-loaded ball screws, heavy-duty bearings, and robust guidance columns for exceptional stability. Its aluminum covers with chamfered corners allow easy attachment of accessories. A high-accuracy USA load cell ensures precise measurement of high loads, essential for rigorous testing. The remote control system enables operators to monitor key parameters like load, displacement, and speed, and control functions such as test initiation and termination. Safety is enhanced with a fully enclosed shield, various gripping options (pneumatic, hydraulic, manual), and integrated limit indicators to prevent sensor overloads. Dual over-travel limits, adjustable via a graduated rule, ensure precise testing control. The machine offers a load measurement range from 0.4% to 100% of rated capacity, with 0.5% calibration accuracy and compliance with ASTM E4, ISO 7500-1, EN 10002-2, and other standards. The rugged, impact-resistant load cell offers excellent mechanical protection and can handle overloads up to 300% without damage.

ATI UTM-Pro Max FEATURES
- Advanced Control System: Supports three closed-loop controls (force, deformation, displacement) with seamless mode switching.
SOFTWARE
TECHNICAL DATA
| MODEL | ATI UTM-Pro Max |
| Compliance Standards: | ASTM E4, ISO 7500-1, EN 10002-2, BS1610, DIN 51221 |
| Testing Load Accuracy: | ± 0.5% |
| Testing Load Range: | 50 kN, 100 kN, 200 kN, 500 kN, 600 kN, 1000 kN, 2000 kN |
| Testing Load Accuracy: | 0.4% ~ 100% FS |
| Load Resolution: | 1/500’000 FS |
| Deformation Measuring Range: | 0.2% ~ 100% FS |
| Deformation Accuracy: | ≤ + 0.5% |
| Deformation Resolution: | 1/500’000 FS of the maximum deformation |
| Test Control Mode: | Three Closed-Loop control, stress, strain and displacement |
| Displacement Accuracy: | Within ± 0.5% of the value |
| Displacement Resolution: | 0.04 μm |
| Constant Force Control Range: | 0.001 ~ 5% FS/s |
| Constant Force Control Range Accuracy: | When the rate is < 0.05% FS/s, it is within ± 2% of the set value. When the rate is ≥ 0.05% FS/s, it is within ± 0.5% of the set value |
| Constant Deformation Force Controll Range: | 0.005 ~ 5% FS/s |
| Constant Deformation Force Control Accuracy: | When the rate is < 0.05% FS/s, it is within ± 2% of the set value. When the rate is ≥ 0.05% FS/s, it is within ± 0.5% of the set value |
| Crosshead Speed Range: | 0.001 ~ 500 mm/min |
| Crosshead Speed Accuracy: | Within ± 0.5% of the value |

